KitchenAid Cheese Grater Attachment
The KitchenAid Cheese Grater Attachment has become a must-have for every modern kitchen, especially for home cooks who love fast, effortless food prep. This handy accessory turns your stand mixer into a powerful shredding tool so you can grate cheese in seconds without tiring your hands.
Whether you’re preparing pizza toppings, taco fillings, or creamy pasta dishes, this attachment handles soft and hard cheese with remarkable smoothness. Many people love it because it saves time, reduces waste, and offers consistent texture every time. With KitchenAid mixer grater, KitchenAid cheese shredder, stand mixer cheese grater, KitchenAid food grater accessory, and cheese shredding tool, cooking feels easier, faster, and more joyful.
What Is the KitchenAid Cheese Grater Attachment & How It Works?
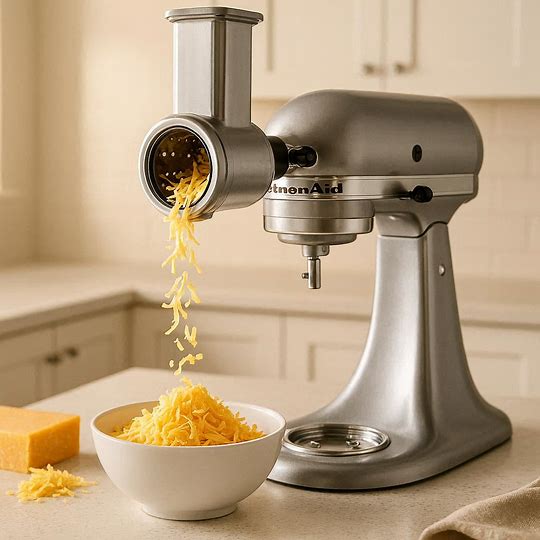
The KitchenAid Cheese Grater Attachment is a KitchenAid food prep attachment that connects to the power hub of your mixer. It uses motor power to spin stainless steel drum blades which grate soft or hard cheese effortlessly. This single upgrade transforms the stand mixer into a multi-tasking food grater for stand mixer that shreds faster than hand tools. The attachment includes multiple cheese shredding drums, giving you options for coarse, medium, or fine cuts depending on your recipe. Many U.S. kitchens now rely on this instead of a manual box grater because it reduces wrist strain and prepares large cheese blocks within seconds.
KitchenAid Cheese Grater Attachment
Its mechanism is simple but powerful. The motor drives the KitchenAid drum blades while you feed cheese through the chute. Pressure pushes food against the blades, producing clean, fluffy shreds. Unlike a rotary hand grater, the mixer handles the grinding, which makes it ideal for bulk shredding. The stand mixer cheese grater can also act like a slicer, depending on drum type. This is why many users compare the spiralizer vs grater attachment, yet the grater wins whenever cheese is involved because it is designed specifically for shredding density and smooth output.
What comes inside the attachment kit
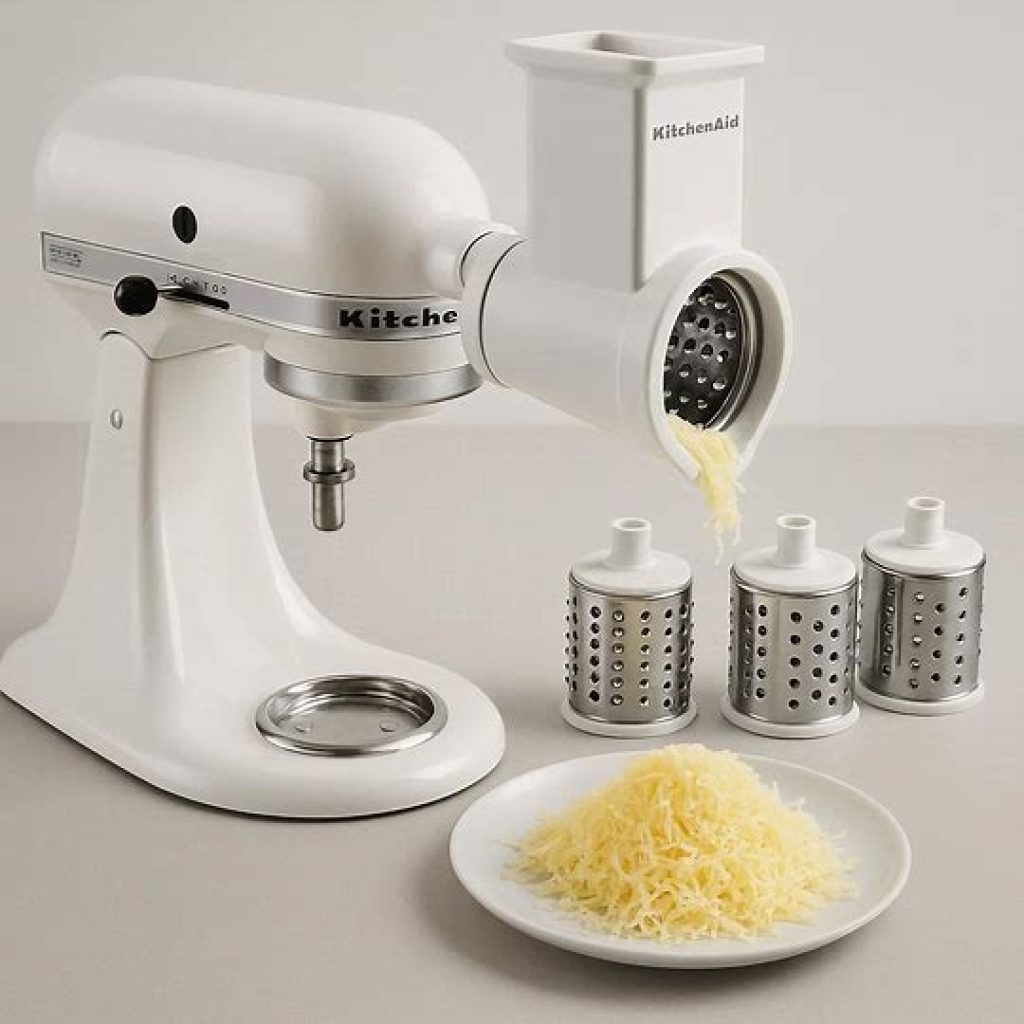
Inside the box, you usually get multiple drums including a coarse grate drum, a fine drum, and sometimes a slicing drum depending on package type. You can check the full drum list & package details from the KitchenAid Fresh Prep Slicer/Shredder Attachment official page. These are often referred to as Soft cheese grater drum or Hard cheese grater attachment, depending on texture suitability. The standard set usually includes a housing unit plus a pusher for safety. Some U.S. retailers also bundle storage cases which help avoid scratches, especially when looking for KitchenAid accessory storage tips.
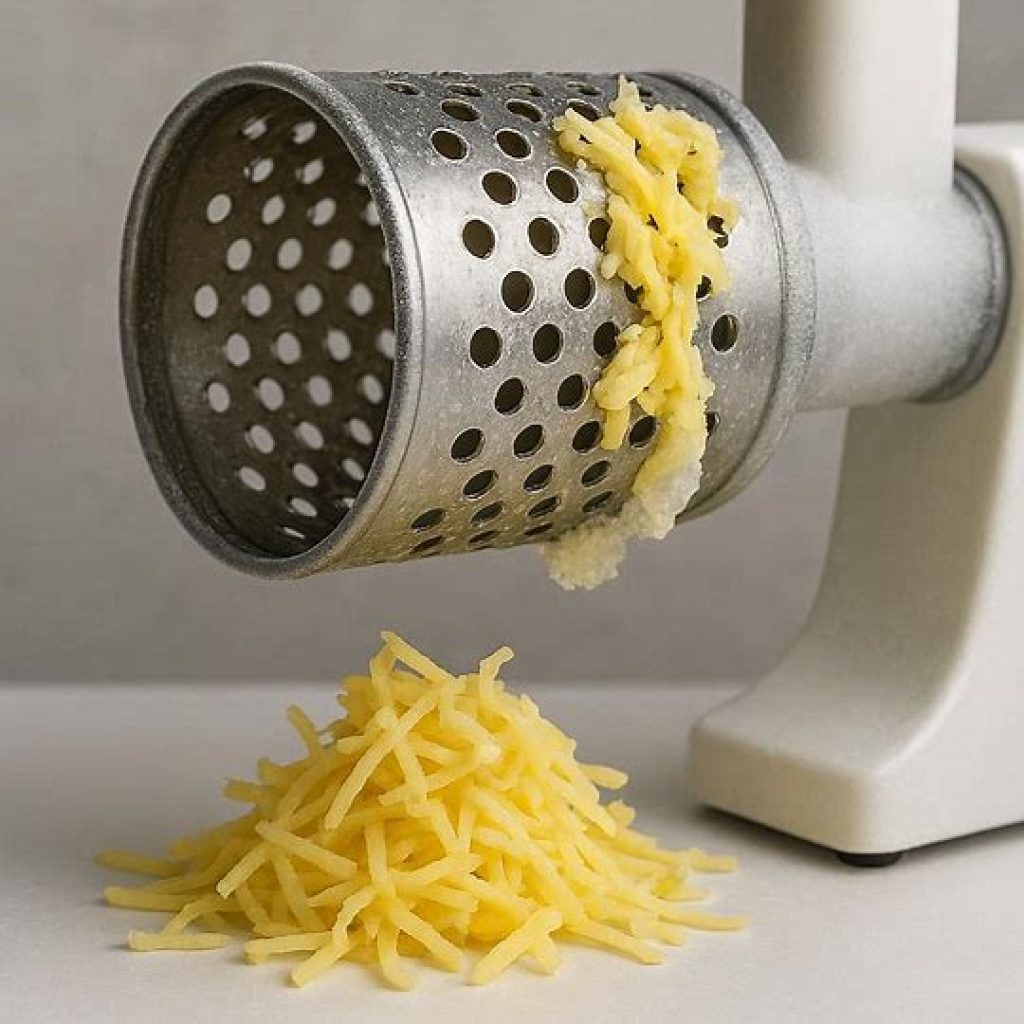
How the drum blades rotate & grate cheese
The rotation starts as soon as the mixer powers the internal shaft. The blades inside the cheese shredding drums scrape cheese with evenly spaced sharp teeth. When constant pressure is applied, the cheese transforms into smooth ribbon-like shreds. This design is what makes the mixer attachment for cheese reliable and fast. You can shred mozzarella for pizza, parmesan for pasta, or cheddar for tacos in under one minute.
How to Attach the KitchenAid Cheese Grater to Your Mixer (Step-by-Step)
Learning how to attach KitchenAid grater correctly determines whether you get smooth shredding or face slipping issues. You start by opening the mixer hub cover, aligning the attachment shaft, inserting it into place, and tightening the knob. Most people install it easily, but many beginners forget alignment which causes wobbling. Following a step-by-step KitchenAid grater usage guide ensures it locks firmly so the drums rotate without jerks. With proper mounting, the KitchenAid mixer add-ons feel like an extension of the machine rather than a loose accessory.

KitchenAid Cheese Grater Attachment
You then insert a drum, push in the pin to secure it, and add cheese gradually. If you rush and overload the chute, you might face clogs or the drum might stop. Smooth shreds come when cheese is cold, drum is secure, and mixer is set at the best speed to shred cheese using KitchenAid. The correct speed prevents melting and reduces pressure on the motor.
Proper installation method for beginners
New users should align attachment teeth with mixer shaft, hold firmly, then tighten the locking screw. Testing rotation before inserting food ensures everything is seated correctly. This method prevents jams later and gives you confidence to grate swiftly at full motor power.
Common mistakes that cause loose fitting or slipping
Many users push too much cheese at once or forget to tighten the screw fully. These grater attachment setup mistakes lead to slipping or rattling drums. Fixing this early keeps shredding smooth and noise free.
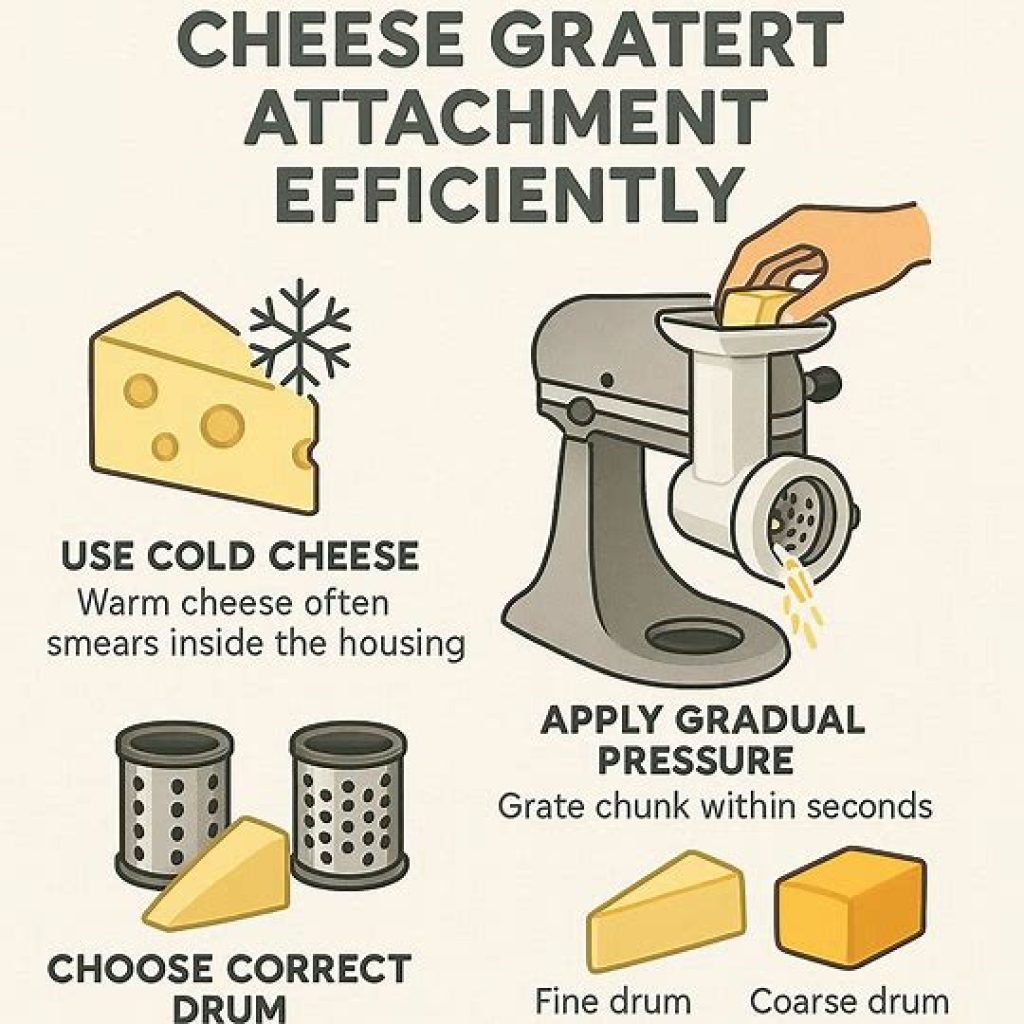
How to Use the KitchenAid Cheese Grater Attachment Efficiently
To grate efficiently, you need cold cheese, gradual pressure, and correct drum choice. Warm cheese often smears inside the housing which creates cleaning problems. Choosing the right drum matters as well. Fine drums work better for parmesan while coarse drums handle cheddar. Once you know the technique, you can grate chunks within seconds, making dinner prep effortless. Many U.S. families shred large blocks during weekends because KitchenAid for bulk cheese shredding saves time and money.
KitchenAid Cheese Grater Attachment
The attachment shines when you use it for parties or meal prep. You can shred 2-3 pounds of cheese quickly, store it, and freeze for later. This is where it performs better than a manual grater or hand shredder. It feels like using a factory-grade KitchenAid slicing & grating kit at home. Smooth shreds fall cleanly into the bowl and the process remains mess-free.
Best speed settings for different cheese types
The best cheese for KitchenAid attachment like cheddar and mozzarella work best at medium-high speed. Harder cheeses like parmesan require a slightly slower speed so blades bite firmly without bouncing. This balance keeps texture consistent without slippage.
Tips to get smooth and fast grating results
Cold blocks grate cleaner. Freeze cheese for 10 minutes before shredding to improve texture. This solves how to get smooth cheese shreds and reduces smearing.
Important safety measures while grating
Always keep fingers away from the chute and use the pusher tool. Safety comes first because the blades are sharp. A safe way to use KitchenAid grater prevents injury while keeping the process fast.

KitchenAid Cheese Grater Attachment
Best Cheeses to Use With KitchenAid Grater (Soft vs Hard)
You can shred almost every cheese type but results vary depending on softness and fat content. Soft cheeses are creamy and may smear if warm. Hard cheeses break into clean snow-like flakes, especially when chilled. A small table below shows which cheese works best with which drum type.
Cheese Type Drum Choice Notes
Mozzarella Soft drum Chill before shredding
Cheddar Standard drum Good for tacos and burgers
Parmesan Hard drum Fine texture ideal for pasta
Monterey Jack Soft drum Melts easily
Soft wheels melt when warm which is why many users ask can I grate soft cheese with KitchenAid. The answer is yes, but temperature matters greatly.
Best soft cheeses for smooth output
Mozzarella, jack, gouda, fontina all work well when cold. Refrigerating at least 15 minutes solves melting problems. This eliminates the issue of why kitchen cheese melts while grating.
Hard cheeses that grate perfectly
Parmesan and romano grate beautifully into fluffy powder. Users often ask does KitchenAid mixer grate parmesan, and the answer is yes, with incredible speed.
The frozen cheese technique for better texture
If cheese sticks, freeze for 10 minutes. It fixes how to freeze cheese for better grating quickly and safely.
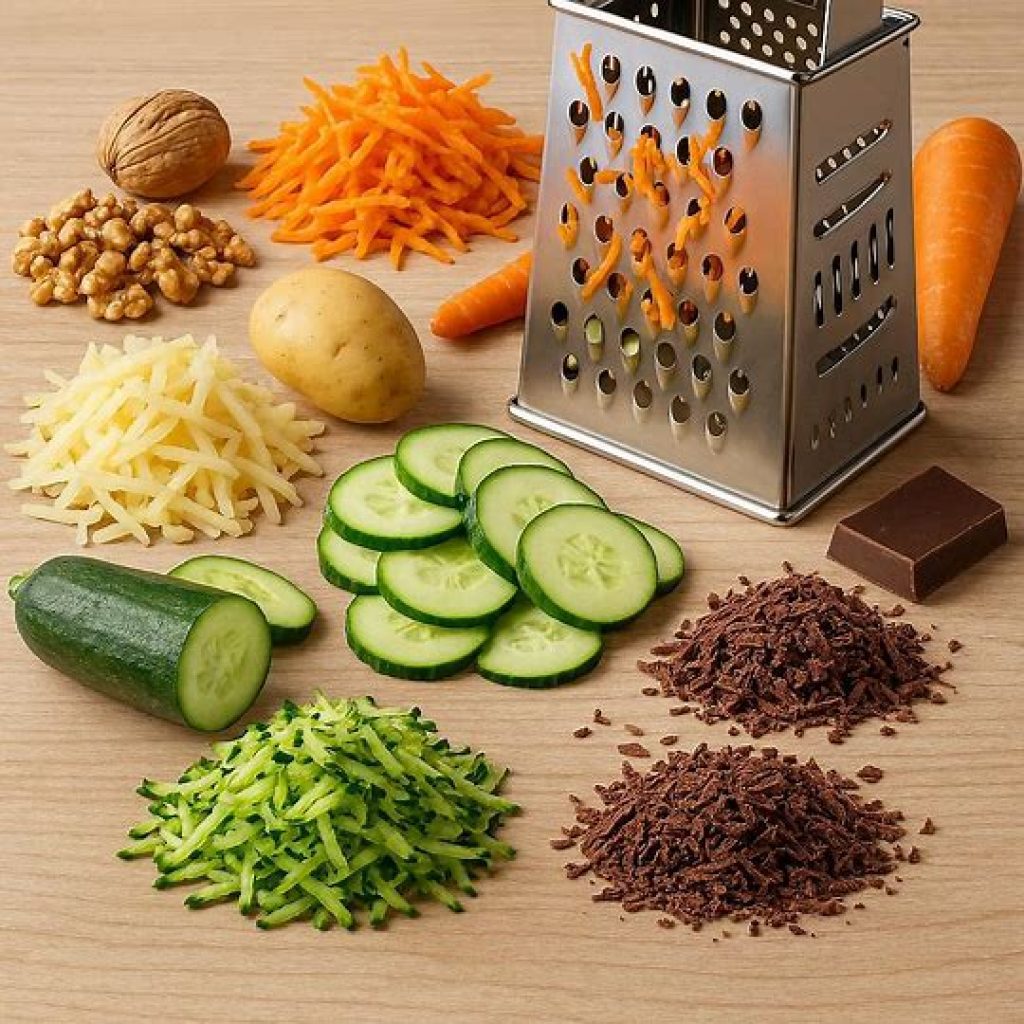
Foods You Can Grate Besides Cheese
This attachment is not limited to dairy. Many users wonder food you can grate besides cheese and the list is surprisingly long. You can also grind nuts, slice vegetables, and shave chocolate for desserts. This transforms the mixer into a versatile prep tool that replaces separate kitchen gadgets.
Some proudly say can KitchenAid shred vegetables and yes, it can. Carrots, potatoes, cucumbers, and zucchini grate well. It works like a micro food processor, yet cleanup remains easier.
KitchenAid Cheese Grater Attachment
Popular vegetables that grate well
Carrots, zucchinis, potatoes, and onions turn into shreds ideal for salads, stir fries, and hash browns.
Nuts you can grind effortlessly
You can grind almonds and walnuts which answers nut grinding using KitchenAid attachment efficiently.
Using the attachment for chocolate shavings
Dessert lovers enjoy chocolate grating with KitchenAid mixer for cakes and hot cocoa toppings.
Common Problems & Troubleshooting Guide
Even great tools cause issues sometimes. Stuck cheese, slow rotation, or melting are common. This section explains KitchenAid grater troubleshooting tips so you fix problems quickly. Temperature plays a big role in smooth shredding. Cold cheese equals cleaner flakes while warm blocks smear.
Thick blocks sometimes jam drums, making users search for KitchenAid grater not rotating fix. In this case, reducing block size or changing speed restores smooth cutting.
Cheese getting stuck inside the drum
Users often ask why is cheese sticking in the attachment, and the reason is temperature and moisture. Freezing solves it instantly.
KitchenAid Cheese Grater Attachment
Drum not rotating or jamming issue
If the drum halts, alignment or overload might be responsible. Correcting angle solves the problem within seconds.
Cheese melting during grating – how to fix
Chill cheese longer and reduce pushing pressure. This solves how to prevent cheese from melting while shredding perfectly.
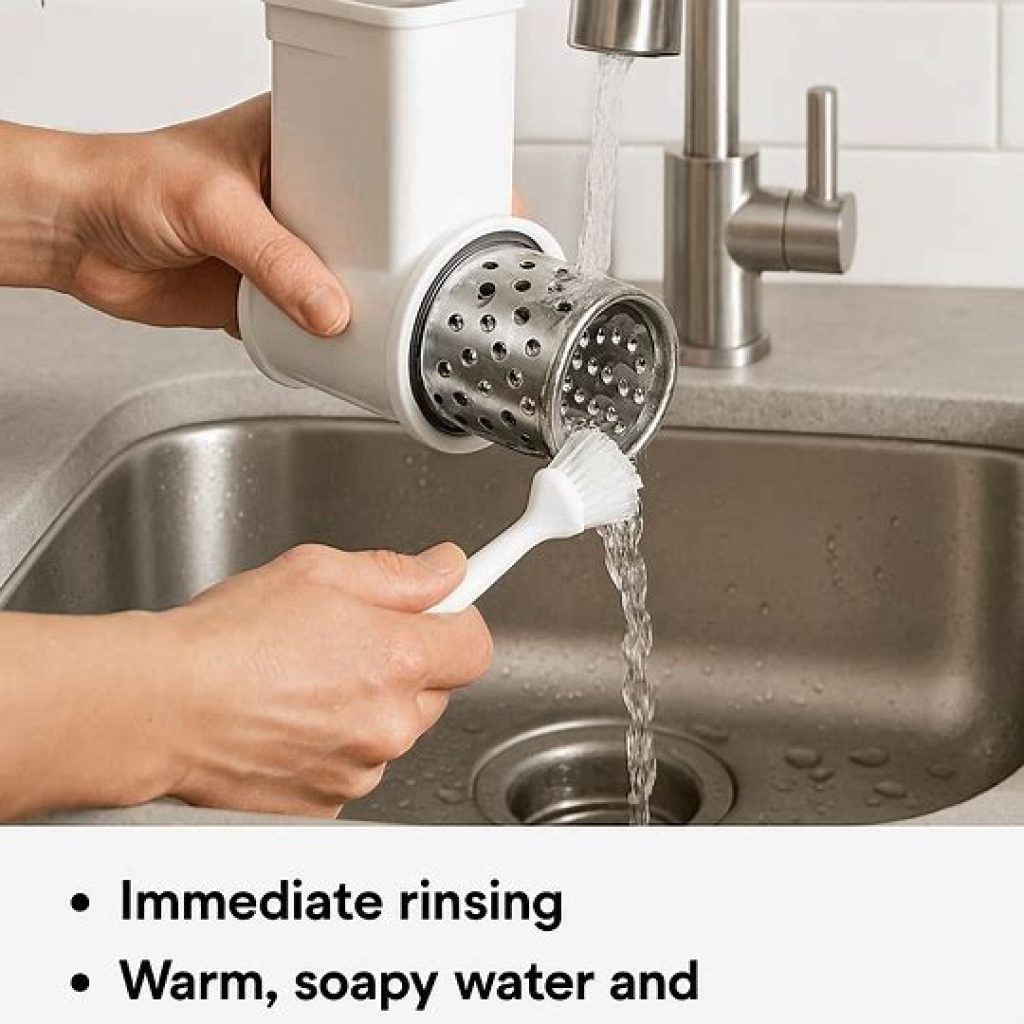
Cleaning the KitchenAid Grater Attachment (Easy Method)
Many buyers ask how to clean KitchenAid grater drums, and the best way is immediate rinsing. Dry cheese hardens like glue, so washing quickly saves effort. Warm soapy water removes oils and residue, and gentle brushing keeps shine. Avoid scrubbing too hard to protect blade sharpness.
Some prefer dishwashers, and yes, dishwasher-safe grater parts make cleanup simple. However, hand washing extends lifespan and keeps shine. Many experienced cooks use mild soap and microfiber cloths for best care.
KitchenAid Cheese Grater Attachment
Which parts are dishwasher-safe
Most drums and housing parts handle dishwashers safely. Yet hand wash vs dishwasher grater cleaning remains a personal choice.
How to hand wash and remove stuck cheese
Soak in warm water then brush gently. It prevents scratches and keeps edges crisp.
Best Way to Store the Attachment for Long Life
Storage affects performance. Keeping drums dry prevents rust and dulling. Some store drums in soft bags or plastic containers which stops scratches. Others use drawer dividers which aligns with KitchenAid accessory storage tips for protection. Proper storage also ensures speed during next use because you avoid searching for parts.
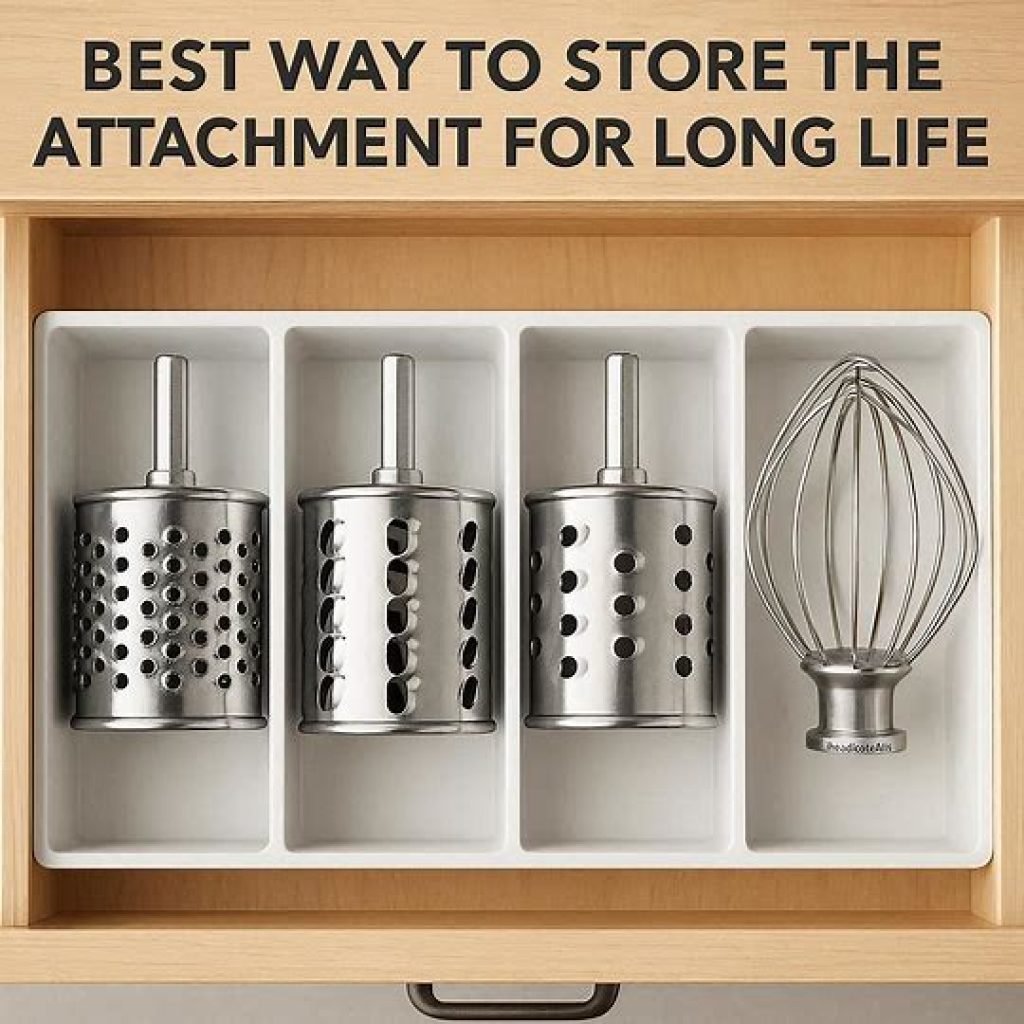
KitchenAid Cheese Grater Attachment
Drum edges stay sharp for years with correct care. This is why knowing how to store KitchenAid grater drums matters for longevity. A dedicated kitchen spot keeps it safe from moisture and metal friction.
Keep drum blades scratch-free & protected
Soft cloth wrapping or padded storage boxes help preserve stainless steel edges.
How to prevent rust or dull edges
Thorough drying prevents rust more than anything.
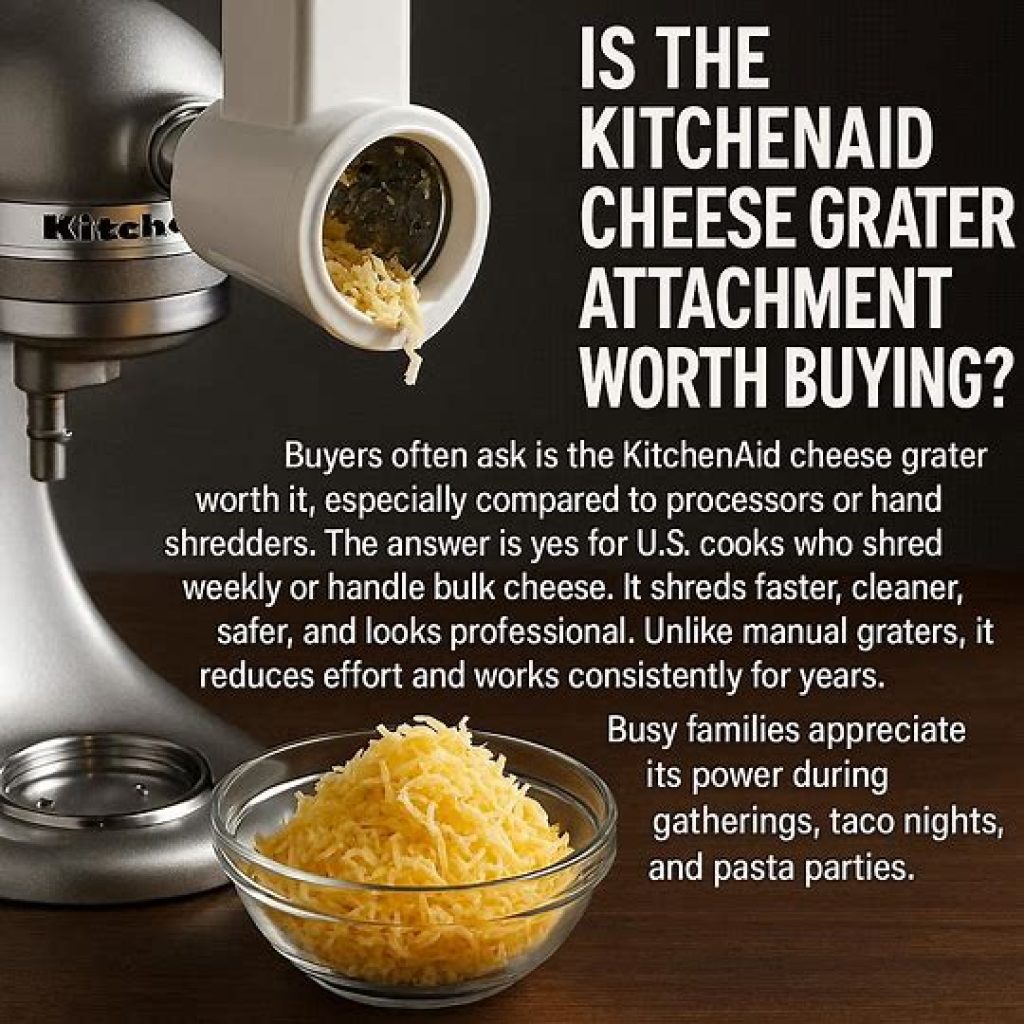
Is the KitchenAid Cheese Grater Attachment Worth Buying?
Buyers often ask is the KitchenAid cheese grater worth it, especially compared to processors or hand shredders. The answer is yes for U.S. cooks who shred weekly or handle bulk cheese. It shreds faster, cleaner, safer, and looks professional. Unlike manual graters, it reduces effort and works consistently for years.
Busy families appreciate its power during gatherings, tacos nights, and pasta parties. Professionals even compare KitchenAid vs food processor grater, yet the mixer wins because cleanup is easier and storage smaller.
KitchenAid Cheese Grater Attachment
Real-life benefits for home cooks
Faster prep means more family time and less arm strain. Anyone wanting convenience will enjoy this.
Who should buy and who may skip it
Best for medium to large families, meal preppers, and cheese lovers.
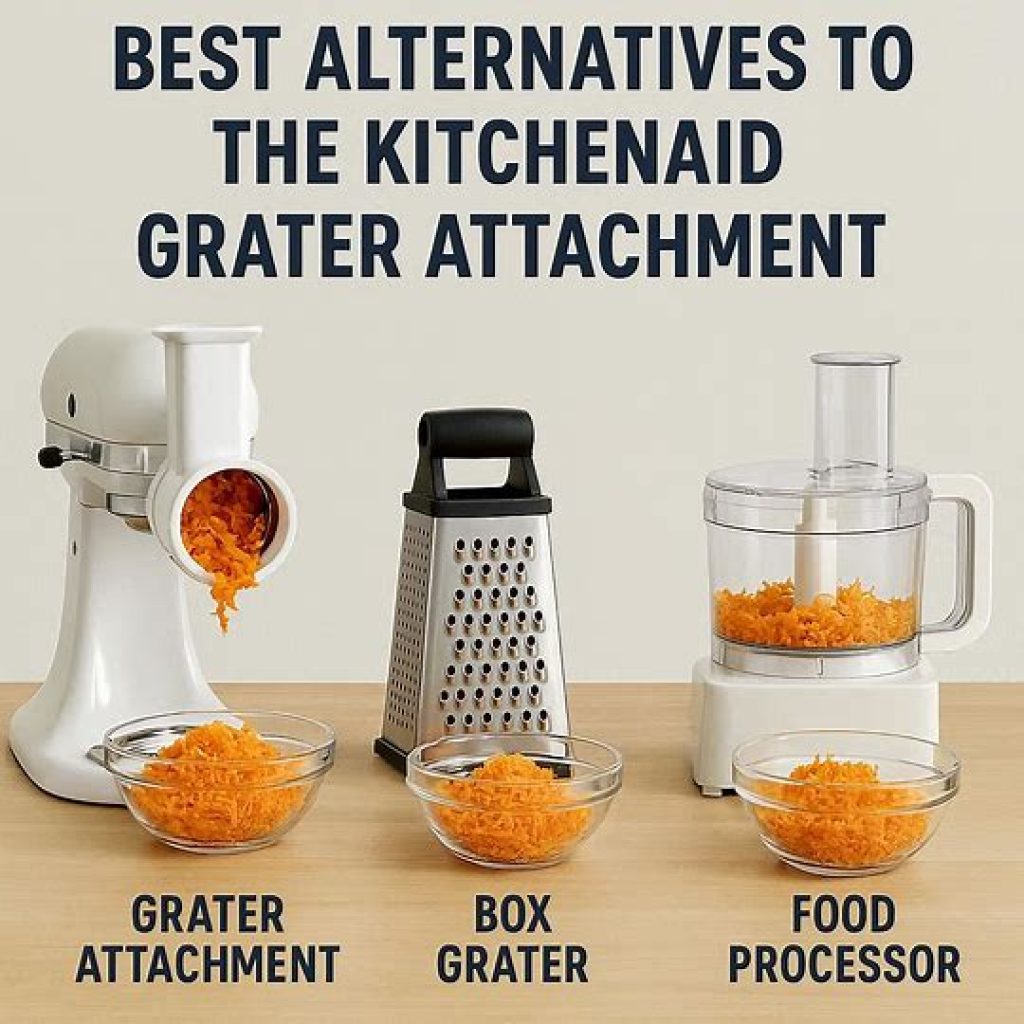
Best Alternatives to the KitchenAid Grater Attachment
Alternatives exist for small kitchens. Some prefer box graters for tiny batches while others buy processors for heavy use. Yet the attachment remains the fastest best attachment for shredding food fast if you own a mixer. Comparing tools shows how much value it gives.
KitchenAid Cheese Grater Attachment
Box grater – cheap but manual effort
The compare box grater vs KitchenAid debate ends when speed matters.
Food processor grater – fast but bulky
Processors shred quickly but require heavy cleanup.
Rotary hand grater – compact for small use
Good for one-time servings but not bulk.
Frequently Asked Questions
Does KitchenAid make a cheese grater attachment?
Yes, KitchenAid offers a specially designed cheese grater attachment that fits your stand mixer. It makes grating cheese, vegetables, nuts, and even chocolate effortless, turning everyday meal prep into a fun experience.
How to attach cheese grater to KitchenAid?
Attaching it is simple with the KitchenAid grater step-by-step setup. You slide the attachment into the mixer hub, tighten the knob, insert the drum, and you’re ready to shred cheese quickly and safely.
Can I shred cheese with my KitchenAid mixer?
Absolutely! Using the KitchenAid mixer accessory grater, you can shred soft and hard cheeses efficiently. The mixer does the hard work, giving perfect, even results without hand strain.
Which KitchenAid attachment is for shredding?
The KitchenAid drum shredder is designed for shredding cheese, vegetables, and other foods. Its interchangeable drums allow you to choose coarse, fine, or slicing options for precise results.
What is the difference between grating & shredding?
Grating creates tiny, fine pieces, perfect for hard cheeses or chocolate, while shredding produces larger strips, ideal for soft cheeses or vegetables. Both textures can be achieved easily with the right KitchenAid attachment for cheese.
Conclusion – Final Verdict for Buyers
The KitchenAid Cheese Grater Attachment stands out as the most convenient tool for cheese lovers who enjoy smooth shreds without hard labor. With correct speed, cold cheese, and proper installation, it works like a mini-factory inside your kitchen. It supports meal prep, saves money by shredding bulk blocks, and cleans easily when washed early. It handles cheese, nuts, chocolate, and vegetables, giving you one tool instead of many.
For U.S. households, this attachment is more than a gadget. It is a long-term investment for cooking comfort. Anyone who values fast prep will enjoy this upgrade, especially when compared with other shredders. With the right care and correct technique, this grater lasts for years and delivers smooth results in every meal.